You've got a great photo. A product shot, a landscape, a character from your AI image generator. Now you want it to move.
Not a slideshow with a zoom effect. Actual motion. Water rippling, hair blowing, a character turning their head.
That's exactly what image-to-video AI tools do. And in this guide, I'll walk you through the process step by step with Runway. For this update, I re-ran the entire flow in July 2026 using Runway's current interface.
- Runway turns images into short AI videos in minutes: upload an image, describe the motion as text, generate. In my test, a 5-second clip with Gen-4 Turbo cost 25 credits
- Free alternatives 2026: Pika 2.5 (80 credits/month), Kling AI (about 2 clips/day), and Stable Video Diffusion (local)
- Best results with high-resolution, square images (1024x1024+) and subtle animations like hair movements
1. Sign Up & Pricing
Before getting started with Runway, you need to create an account. You can do this either by entering your email address or using a Google, Apple, or Facebook account.
Thanks to the "Free Forever" plan, you can test and use Runway directly without worrying about any payment processing:
The Free plan is actually free and starts you off with a one-time credit allowance. For context from my retest: a 5-second clip with Gen-4 Turbo costs 25 credits.
However, you cannot edit the videos and they will be watermarked. If you want more, you should upgrade to the Standard Plan:
The Standard Plan originally cost $12 per month with annual billing. It included 625 credits per month, equivalent to 125 seconds for Gen-2, 44 seconds for Gen-1, or 125 image generations. Additionally, watermarks are removed, you can export videos up to 4K resolution, and train your own "AI Generator." Check Runway's website for current pricing and credit allocations, as these have changed with the release of Gen-3, Gen-4, and most recently Gen-4.5 (late 2025).
Runway's popularity is also reflected in the numbers: after $90 million in annual recurring revenue by mid-2025, the company was valued at $5.3 billion in a Series E round in February 2026. Competition in the space has only intensified since then, with new Runway generations like Gen-4.5 pushing quality further.
2. Create Video
Once you're logged in, you land in the new apps hub ("What do you want to create?"). Runway has completely rebuilt its interface: instead of individual editors, there are now starter kits, tool apps, and a model picker.
For image-to-video, click the "Video" tab and pick a model. On the basic plan, you get Gen-4 Turbo; the newer Gen-4.5 and Aleph 2.0 models are reserved for paid plans. Notably, Runway now also bundles third-party models like Kling 3.0, Seedance 2.0, and Google's Nano Banana 2 under the same roof.
In the editor, you first need a start frame ("First Video Frame"). There are three ways to get one: upload your own image, pick one from your asset library, or generate the start frame right inside Runway with a text prompt. The old detour through a separate text-to-image tool is now built in.
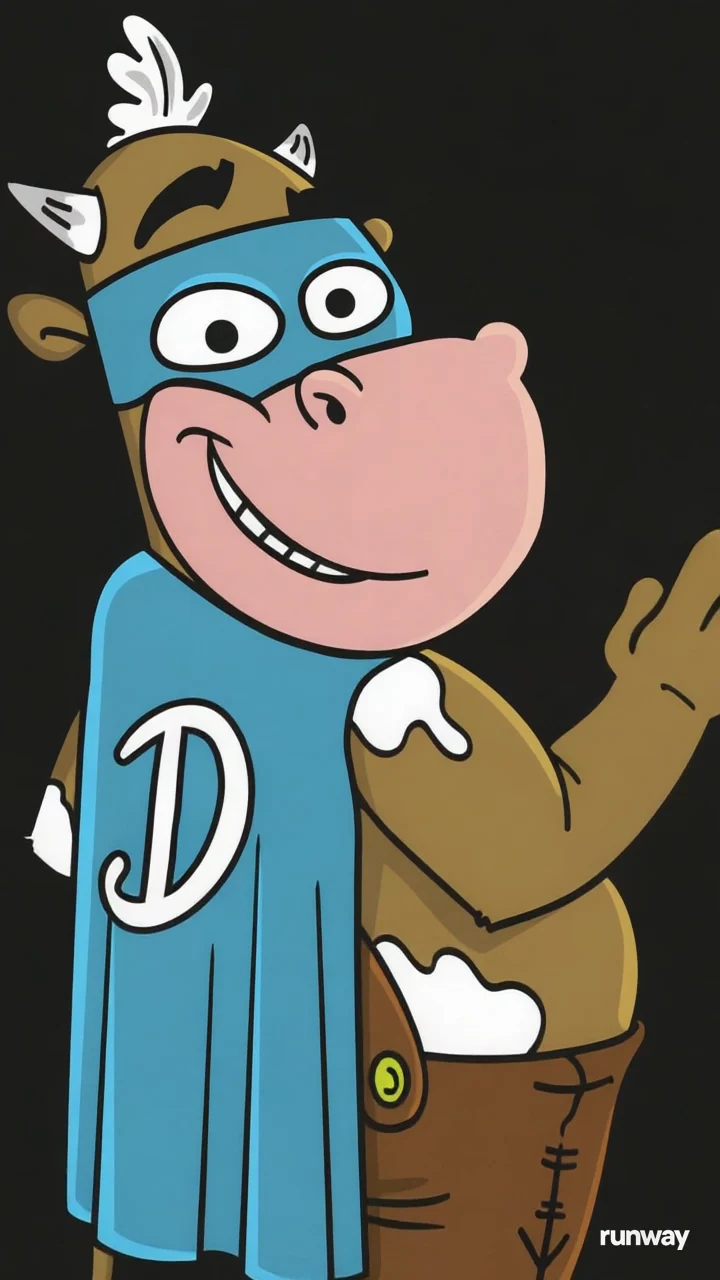
For my example, I picked a cartoon superhero cow from my asset library. Runway automatically adjusts the aspect ratio to the image (9:16 in my case).
You then control the motion with an optional text prompt ("Describe your shot"). For example, I entered: "the superhero cow waves at the camera and laughs, slow zoom in".
Then click "Generate" at the bottom right. In my test, the 5-second clip cost 25 credits and was ready after two to three minutes.
3. Export, Publish, and Share Video
Once the animation looks right to you, export the video in your preferred format. Runway offers various export options for different needs.
Right on the finished clip, Runway offers a 4K upscale button and the option to use the last frame as the start frame for your next clip ("Use frame"). That's how you build longer sequences.
Here is the result of my retest, the animated superhero cow (5 seconds, Gen-4 Turbo):
4. Tips for Optimal Results
Results in image-to-video conversion are often not good. The reason is usually that the movements look unnatural and don't "fit together."
To avoid this, it's important to work from layer to layer when creating:
Think of your video in "layers," where each represents a different depth/distance. Objects that are closer are in the front layers, and objects that are farther away are in the back layers.
Important to understand:
Closer objects appear to move faster to the human eye than distant ones (this concept is called "motion parallax").
Spell that out in your prompt: name the foreground motion first (faster), then the background motion (slower), e.g. "the reeds in the foreground sway quickly, the clouds in the background drift slowly".
Keep the movements subtle overall. The more that's supposed to happen at once, the sooner the model starts distorting details.
Frequently Asked Questions About Image-to-Video Conversion
In 2026, there are several strong free and affordable alternatives:
- Pika 2.5: 80 free credits monthly (480p), improved character animation
- Kling AI: About 2 free clips daily (66 credits/day), start/end frame control
- Freepik AI Video: 3 free videos daily, combines multiple models
- Stable Video Diffusion: Completely free, runs locally on GPU
- Luma AI Dream Machine: 30 free generations monthly
The quality often reaches 80-90% of Runway at zero cost.
2025 and 2026 brought several breakthroughs in AI video generation:
- Camera Control: Precise control over zoom, pans, and perspective changes
- Start/End Frame Control: Define the beginning and end point of the animation
- Enhanced Object Recognition: Better separation of foreground and background
- Batch Processing: Animate multiple images simultaneously
- Style Consistency: Maintaining the original image style
- Longer Clips: Tools like Runway now support longer single-generation clips
These features have made AI video generation viable for professional workflows.