Want to use Gemini in your own application, automation, or server-side workflow?
You need a Google Gemini API key. The setup starts in Google AI Studio. The important part comes after that. Treat the key as a password, not as a code snippet to copy around.
This guide covers the current flow for new auth keys, the safe handling of existing standard keys, and a minimal server-side test.
- Create an API key: Google AI Studio > Dashboard > API Keys > Create API key > select a project
- New AI Studio keys are auth keys. Store them only as a server-side environment variable, never in frontend code or a repository
- New accounts start on the free tier. Check model limits and current prices before production use
1. Prepare your Google account and project
You need a Google account to use the Gemini API. After new users accept the terms, Google AI Studio automatically creates a default project and API key.
If you already use Google Cloud, AI Studio does not automatically show every project. Open the project overview in the dashboard, import the project you need, then create a key from the API Keys page.
Google’s API key guide documents both paths and the required permissions for imported projects.
2. Create a Gemini API key in AI Studio
Open Google AI Studio. In the dashboard, select API Keys, then Create API key.
The overview below shows the Test project with no API keys.
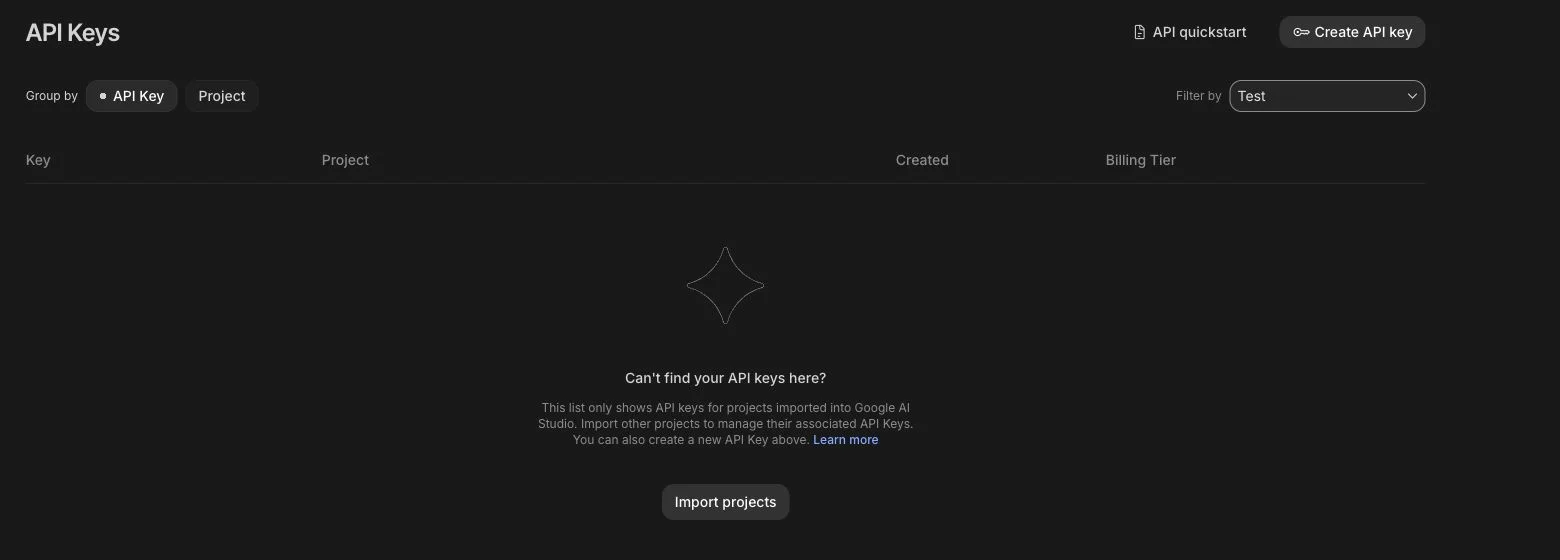
In the Create a new key dialog, name the key clearly and select an imported project. Create a new project only when it genuinely needs to be separated from your existing environments.
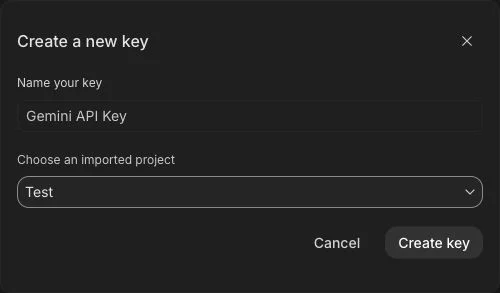
Check the name and project, then select Create key. After the key is created, copy it and store it only on the server.
3. Store the key safely on the server
Use the key only on the server. For a local test, set it as an environment variable in the current terminal session.
export GEMINI_API_KEY="YOUR_API_KEY"For a website or app, the request belongs in a backend. The browser should call only your own endpoint. In production, store the key in the hosting provider’s secret manager.
4. Secure existing keys or replace them with an auth key
The official Google documentation names September 2026 as the point when Gemini API requests using standard keys will be rejected. New AI Studio keys are already auth keys.
For an older project or a key of unclear origin, use the safe migration path. Create a new auth key in AI Studio, update the environment variable and deployment configuration, test the request, then revoke the old key only after a successful test.
An older Gemini-only key marked “Unrestricted” can be secured directly in AI Studio. Hover over the label, select Add restrictions, then Restrict to Gemini API only, and confirm with Restrict key. That limits the key’s scope, but does not change its type or replace an auth-key migration.
For IP addresses, websites, or applications, open the key details in the Google Cloud Console. Do not share a Gemini key with other Google APIs. Create a separate key for them, because additional API restrictions can stop Gemini requests from working with that key.
5. Check costs, limits, and billing
New accounts start on the free tier. Available models, rate limits, and prices change by model and tier. The binding values are on the Google pricing page. For a cross-model comparison, use the LLM Price Index.
To access higher limits or paid models, you link a billing account. Google notes that moving to the paid tier can require a minimum $5 prepayment, depending on the account. Read the final Google screen before you set up billing.
Monitor usage in AI Studio under Dashboard > Usage. Add Google Cloud billing alerts before a project goes into production.
6. Test the API from the server
The following command follows the current REST reference. It uses the environment variable from the previous step and the active gemini-3.8-flash model. Replace the model name only with a model available to your project and tier.
curl "https://generativelanguage.googleapis.com/v1beta/interactions" \
  -H 'Content-Type: application/json' \
  -H "x-goog-api-key: $GEMINI_API_KEY" \
  -X POST \
  -d '{
    "model": "gemini-3.8-flash",
    "input": "Explain machine learning in one sentence."
  }'
A successful response confirms that the key, project, and model access line up. If the Create API key button is unavailable, an imported project usually lacks IAM permissions. If an older key is blocked, create a new auth key and revoke the old key only after a successful test.
Frequently Asked Questions about the Google Gemini API
New accounts start on the free tier. Available models and rate limits vary by model and tier.
Check the current Google pricing page and our LLM Price Index before you plan a budget.
New keys created in Google AI Studio are auth keys. They are bound to a service account and restricted to the Gemini API by default.
Google documents the move from standard to auth keys for September 2026. To migrate, create a new auth key, update your application, test it, then revoke the old key. The full sequence is in the official auth-key migration guide.